How to Create a GraphQL API with AWS Database in 10 Easy Steps

GraphQL it's one of those technologies in the web development industry that is taking more relevance each day that goes by. It was released by Facebook in 2015 and has been well received by the community and gaining momentum with developers.
Here are some of the main advantages
- It's fast, as it gives the client the ability to select only the fields it wants.
- No URL confusion as it provides developers a single endpoint to work with.
- Improve performance since you don't need to make that many requests.
- It's self-documenting; GraphQL takes care of documenting your API so you can focus on what's really important.
- No under-fetching or over-fetching as you only get the results need it for a specific scenario.
And even though it's not a perfect technology but with every new version, it gets better, to the point that some developers claimed to be better than Rest APIs. Personally, I like it since it allows the client to decide what it wants.
But how can we start taking advantage of GraphQL? Let's follow this easy tutorial to build our first GraphQL service to manage an app's users and connect it to a PostgreSQL database hosted in AWS.
Prerequisites
All you need to follow this tutorial is the following:
- VS Code (Any IDE or text editor is fine)
- A Web Browser
- AWS Account (Free Tier)
- Node.js
- Yarn Package Manager
- Basic knowledge in npm and Typescript
You can use the Free Tier of AWS to test certain services free of charge with some usage limits. One of those services is the database.
Step 1: Create the Database
The first thing we need is to create the PostgreSQL database. We're going to do this in AWS since it's a great way to acquire some cloud experience.
Access your AWS Account and in the management console, go to the RDS service.

Click on Databases.
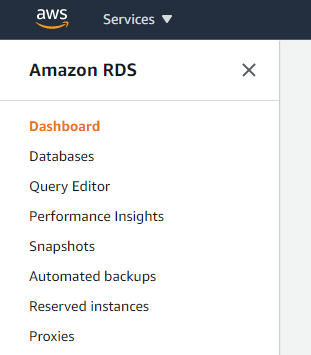
And then click on Create Database.

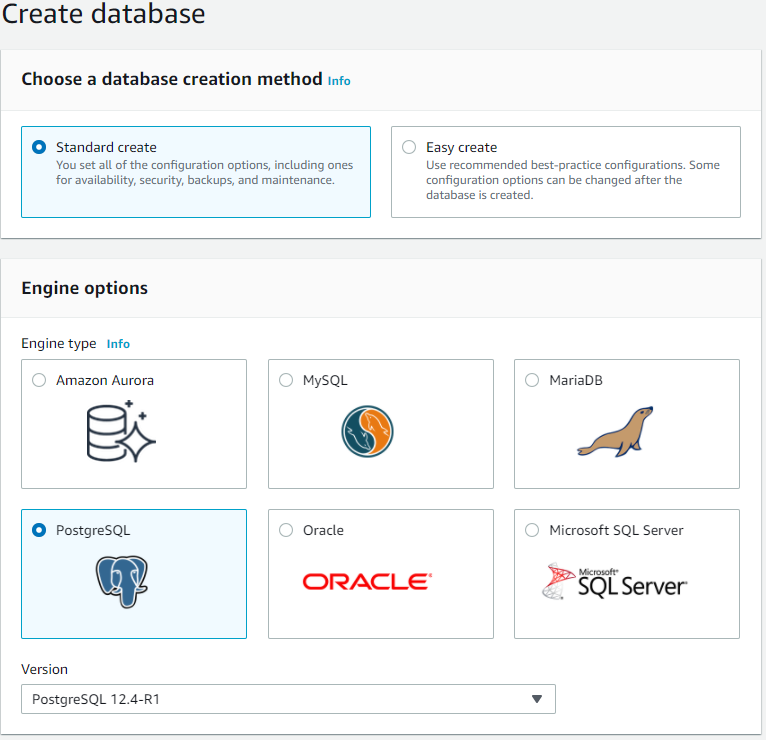
Then we select the creation method: Standard. The engine: PostgreSQL. And the database version.
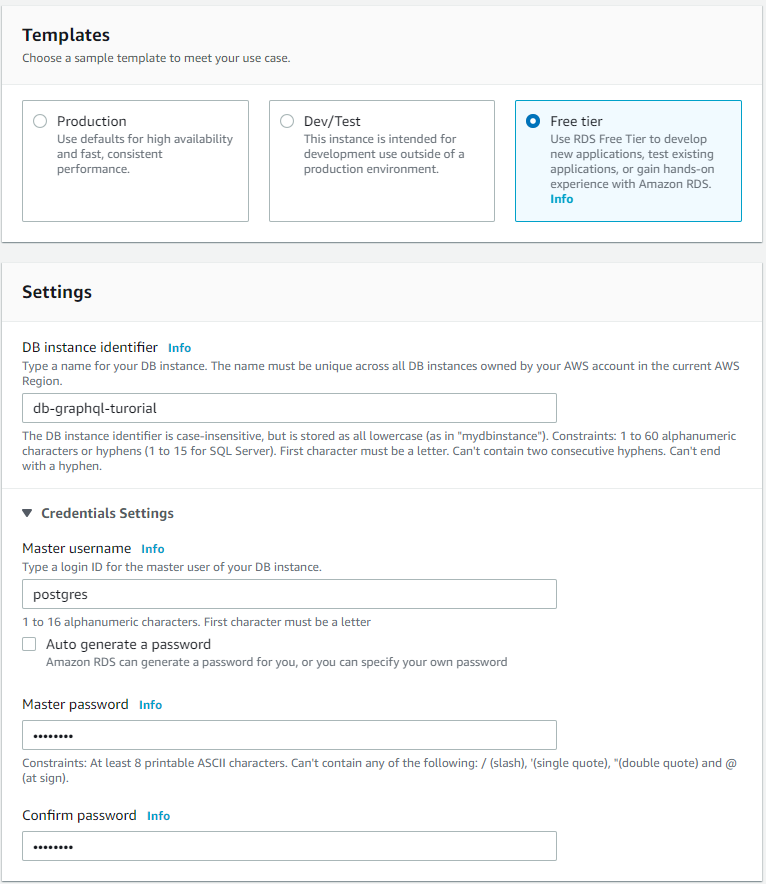
We select the template for this tutorial, Free tier. We assign an identifier to our database resource, a master username, and a master password.
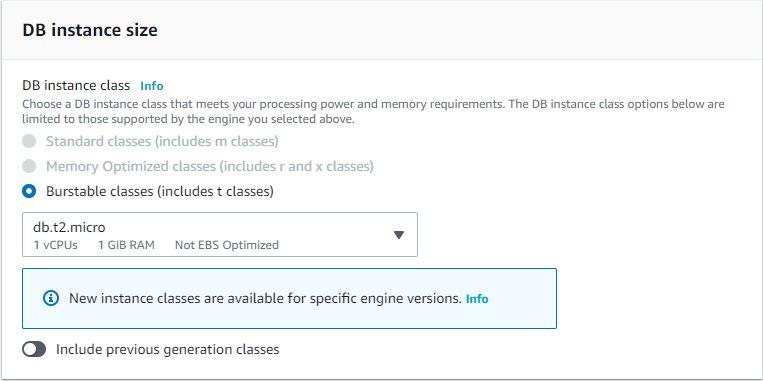
We leave the DB instance size settings as it is.
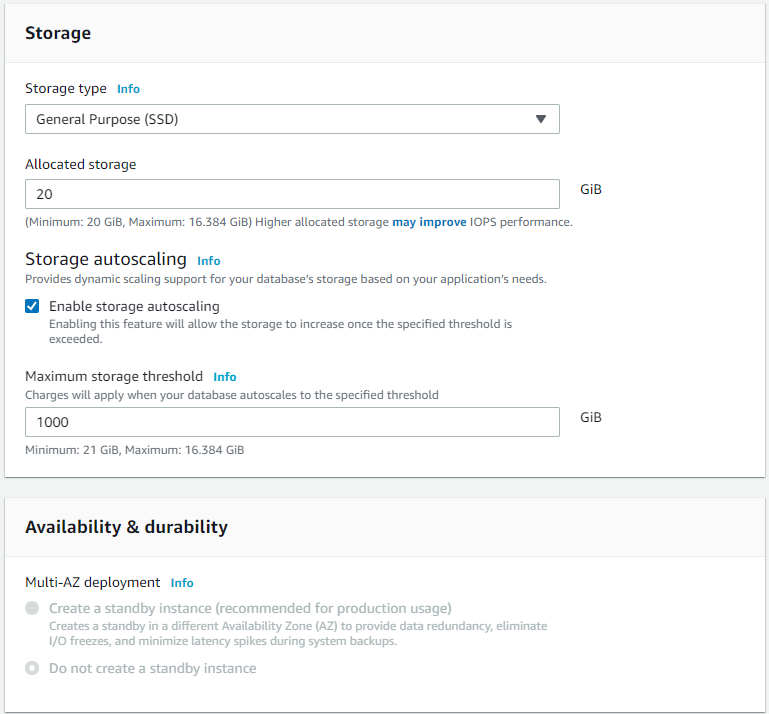
We also leave the Storage and the Availability & durability as it is.
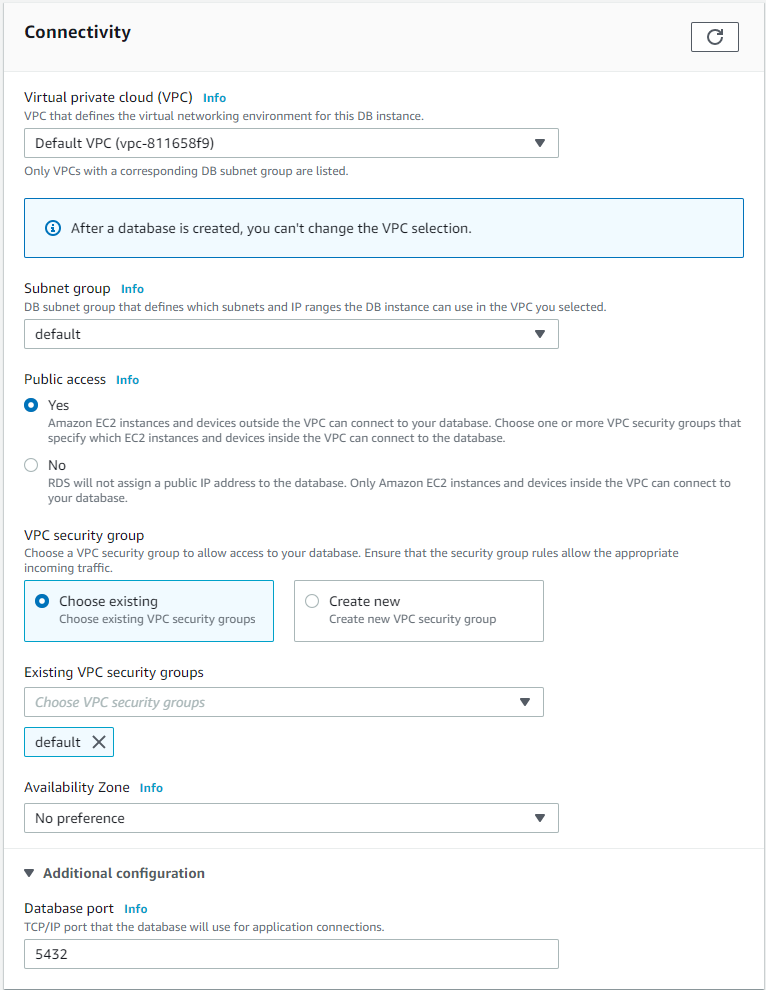
In the connectivity section, we are going to select the default VPC and default subnet. We could create our own VPC and subnet if we wanted to resemble a little more to a productive environment. We are going to set the Public Access to Yes. We select the default security group, which we are going to modify later. And we leave the default Availability Zone and Port.
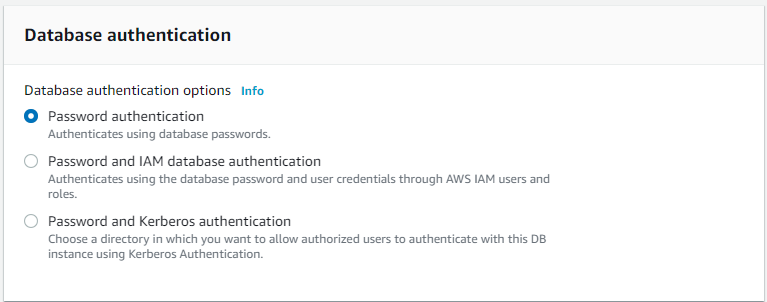
We set Password authentication in the Database authentication setting.
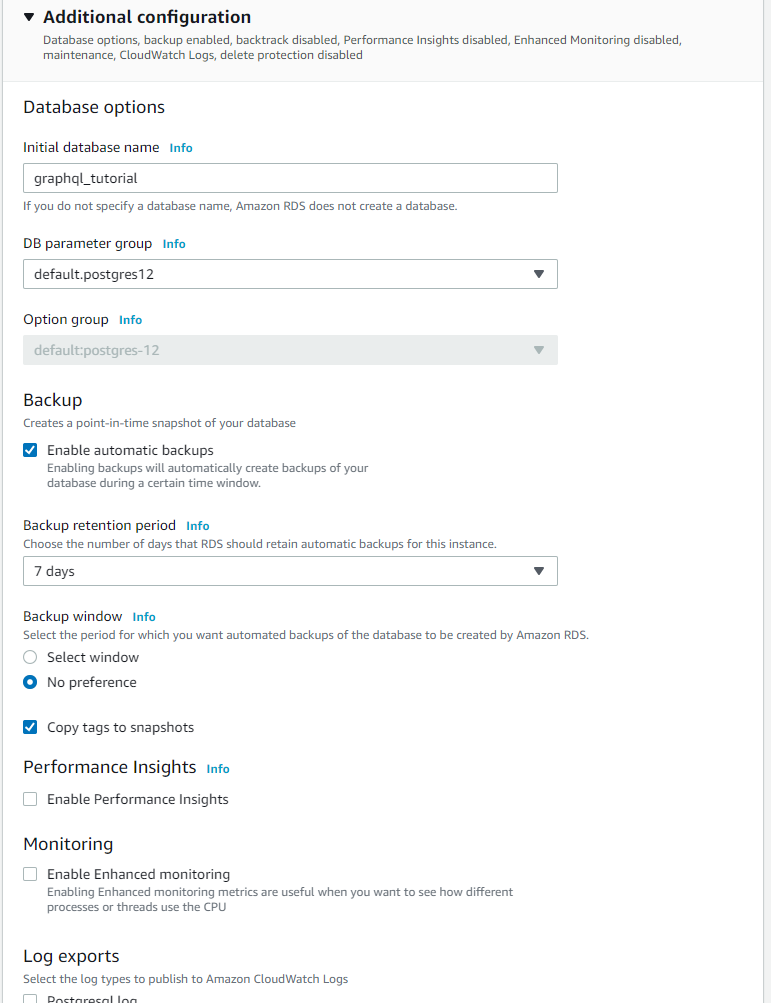
In the additional configurations, we set the database name. We can disable Performance Insights, and we leave the rest of the settings as they are.
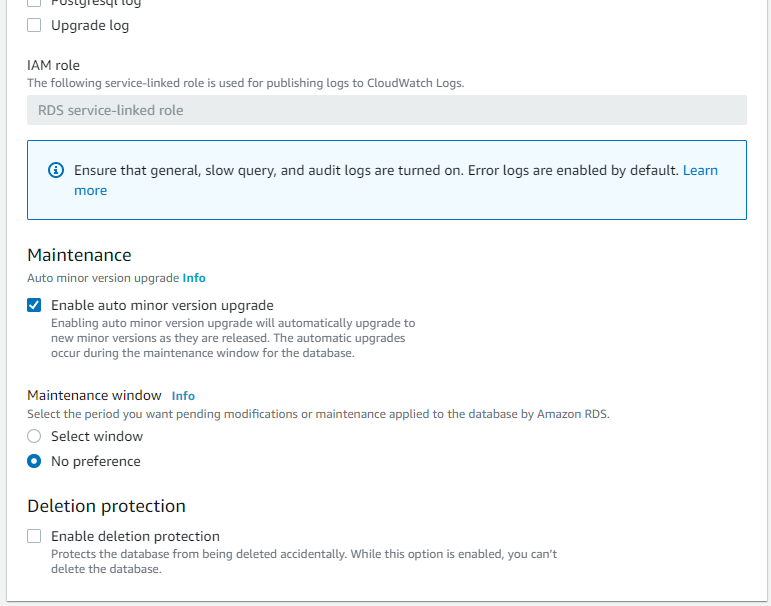
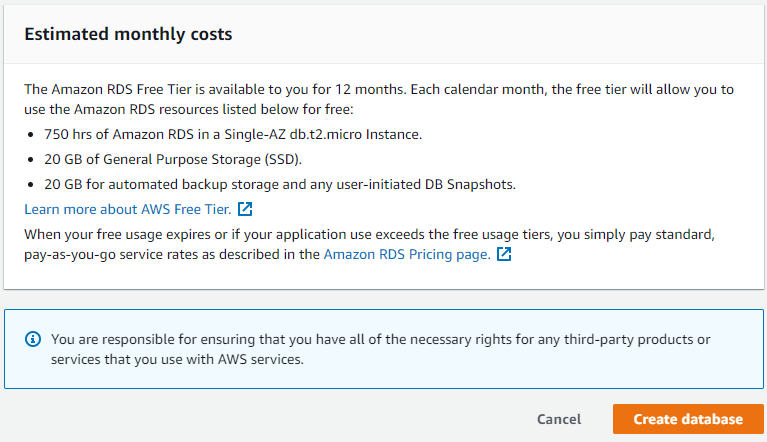
Finally, we review the limits on our Free tier, and we click on Create Database.
We wait a few minutes for the database creation and launch.
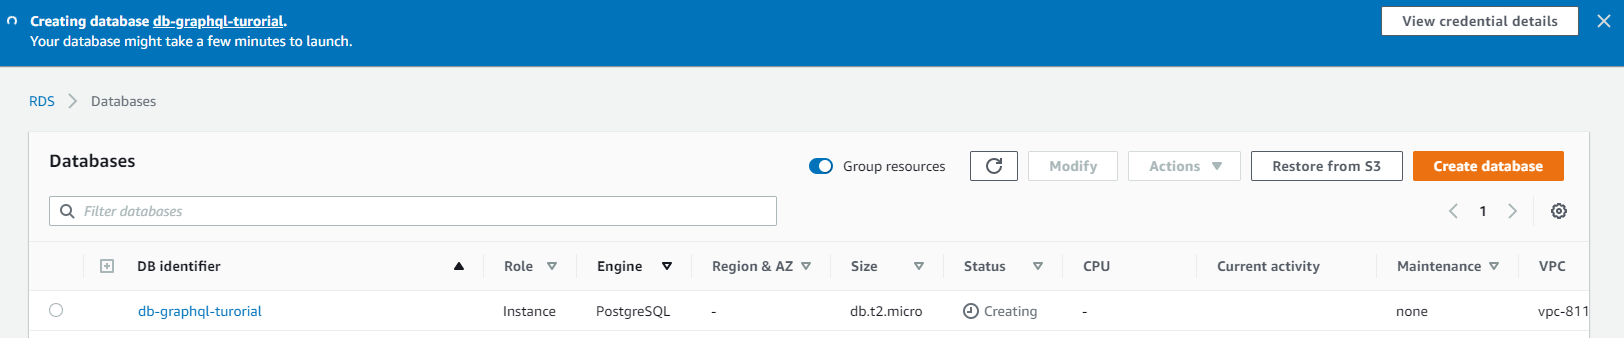
And done. We have our database!

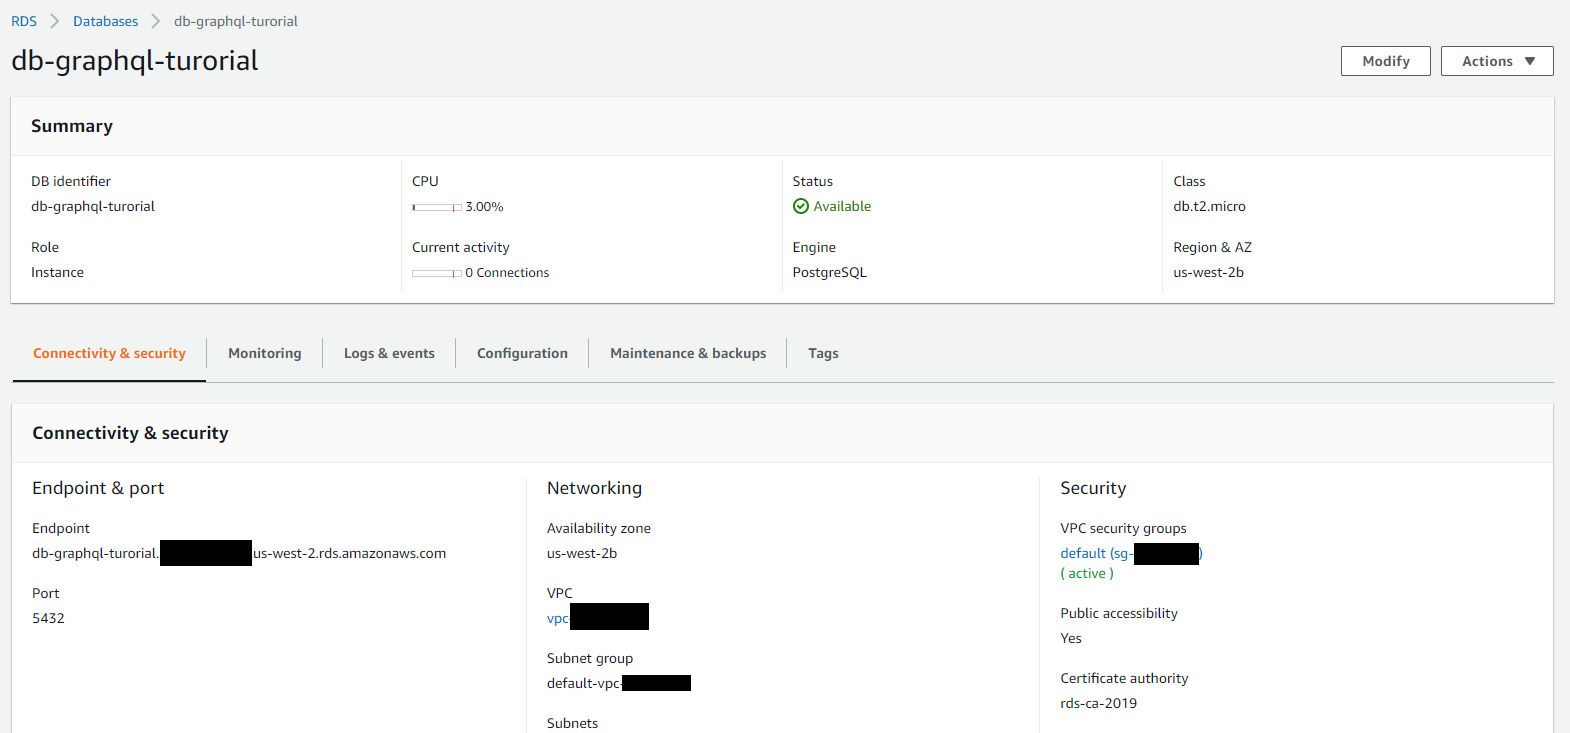
One last thing we need to do is to set our security group to allow inbounds connections from our development client. In this case, our computer.
We click on our database name, then we go to the security section and click on the VPC security group associated with our database.
Then we go to the Inbound Rules and click on Edit inbound rules.
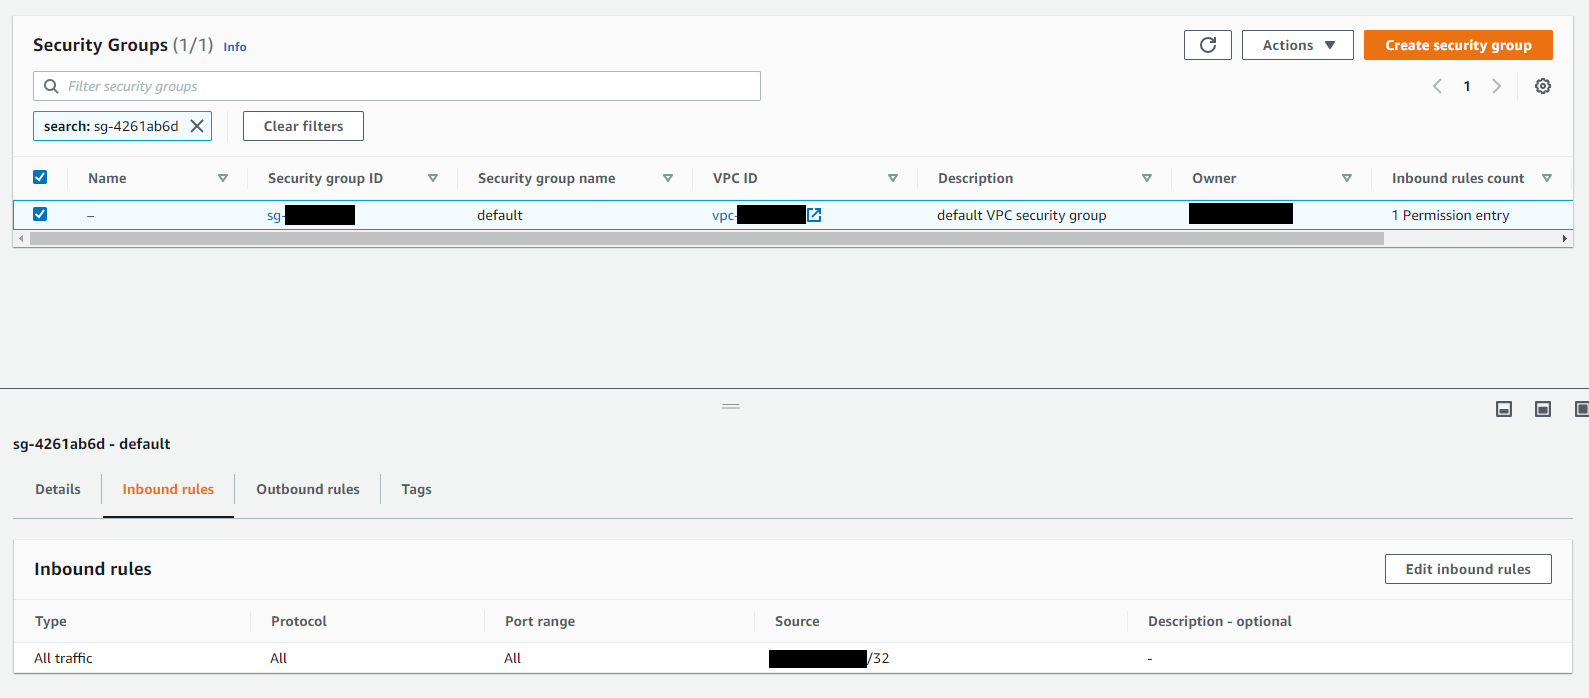
And in source, we change the setting to allow connections from our IP.

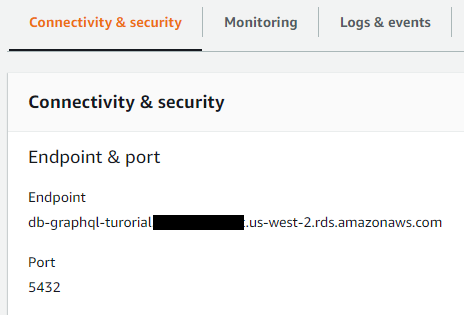
Copy the Endpoint because we're going to need it on the next steps.
Step 2: Check the Database Connection
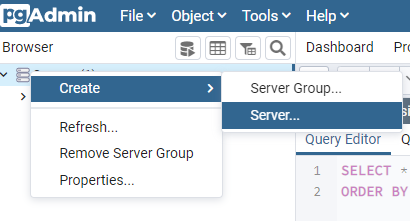
Let's test our database connection. In this case, we are going to use a PostgreSQL administration tool like pgAdmin. You can download it from here.
After installing the pgAdmin and open it, let's Right-click on Servers->Sreate->Server:
We give our Server a name.
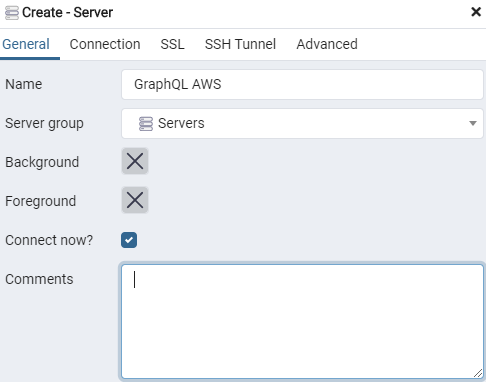
In the connection tab, we add the hostname URL and the name of our database. And set the username and password. Finally, we click save.
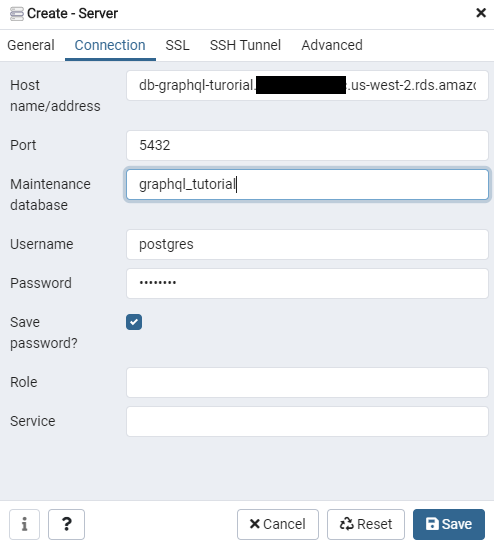
If everything went well, we'd be connected to our AWS database.

Now those configurations are set low in this development environment. In production, we would need to set higher security configurations.
Step 3: Create our project structure
As I said in the beginning, you're going to need Node.js and the package manager, Yarn. So please install Node if you don't have it following this link Node.js and after that, install Yarn following these instructions Yarn.
We will use VS Code, a great code editor to use on web projects like this tutorial. You can get it from this link VS Code.
Let's open VS Code and click on open folder. Then create a folder where you want to save the project files.
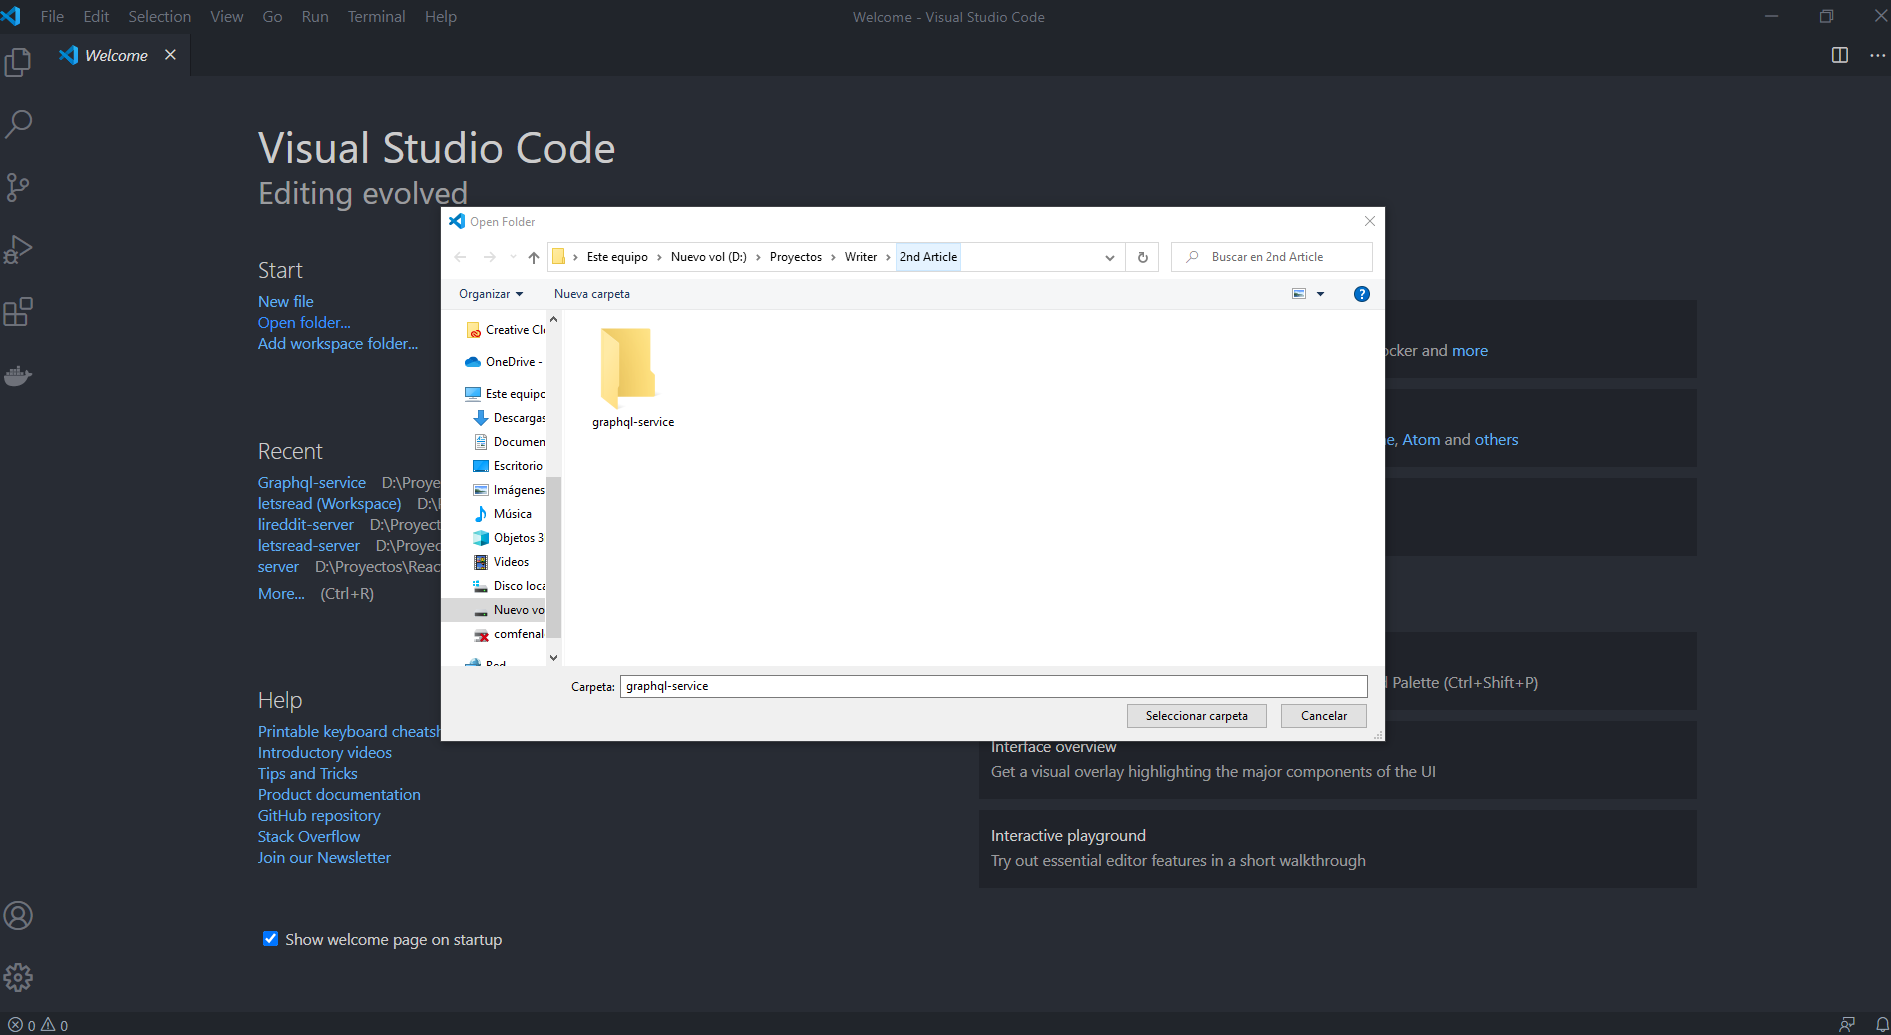
Open the terminal by clicking on the menu Terminal->New Terminal or pressing Ctrl+Shift+ñ if you're on windows. The terminal will be displayed at the bottom of the screen. Here we're going to install all the libraries and resources we need.
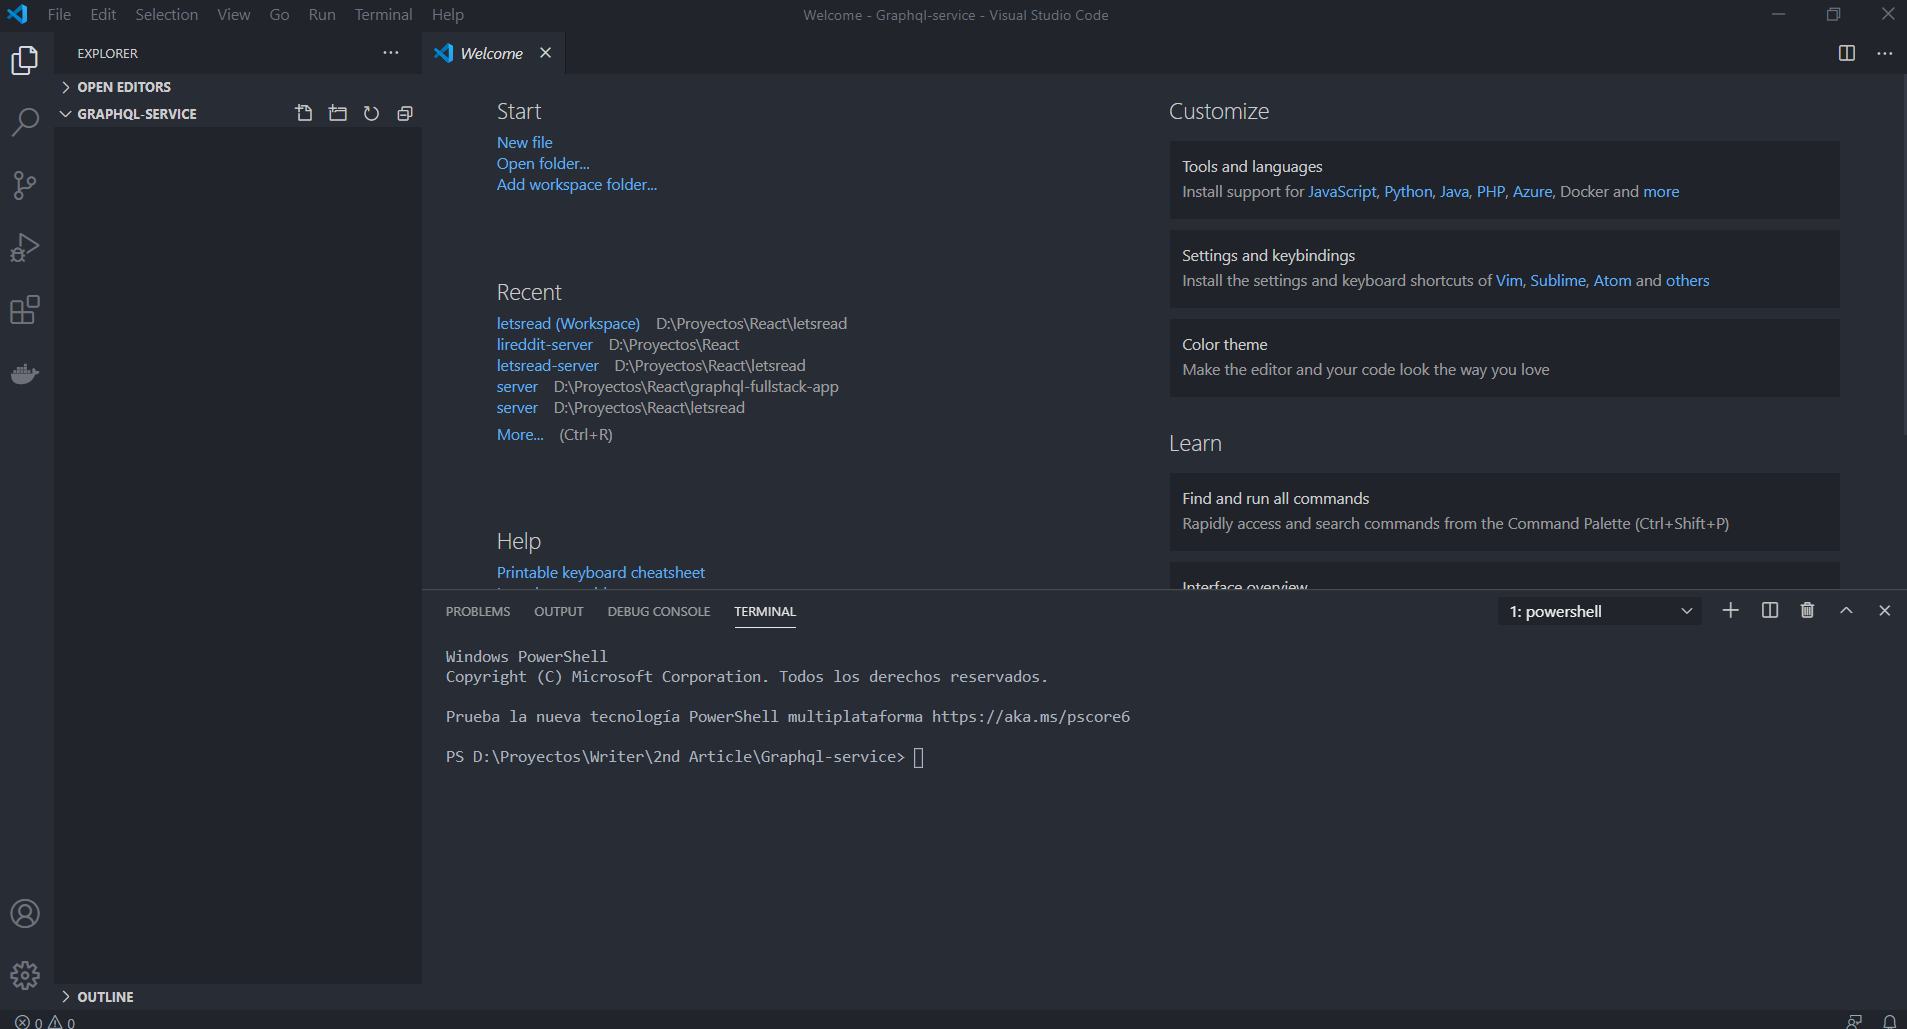
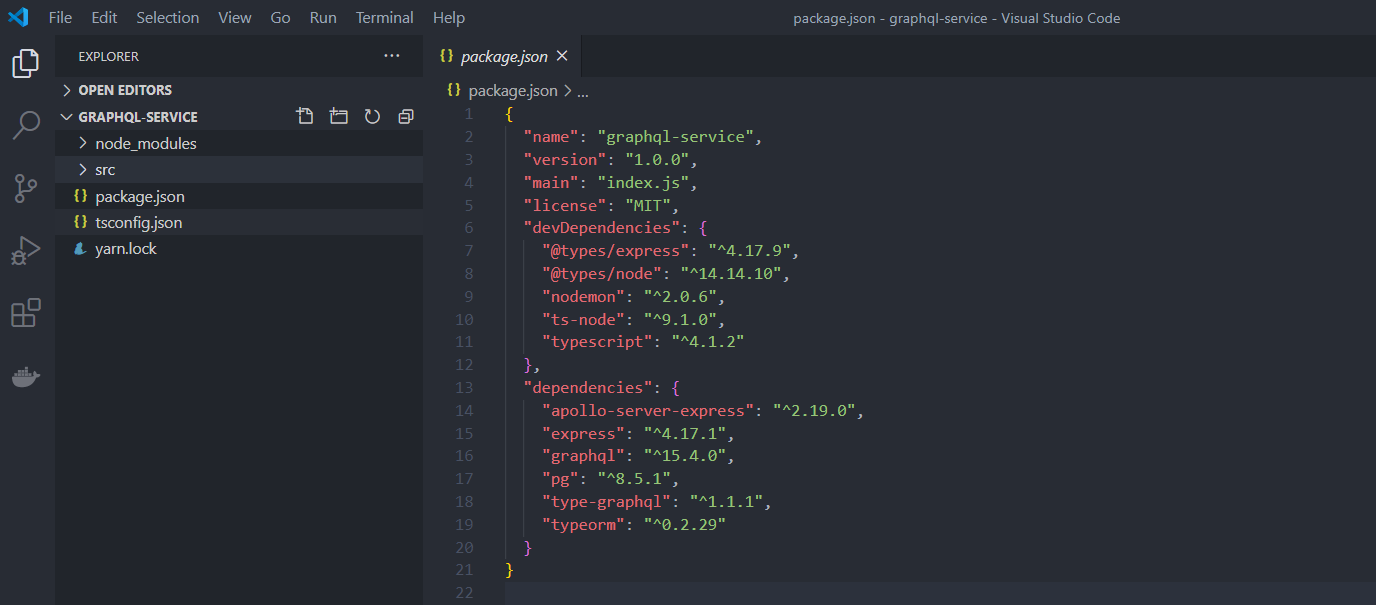
We need to initialize the project by running the command yarn init -y, which will create the package.json configuration file.
We set the -y flag that will automatically answer yes to all questions to create the package file. We can edit the file later.
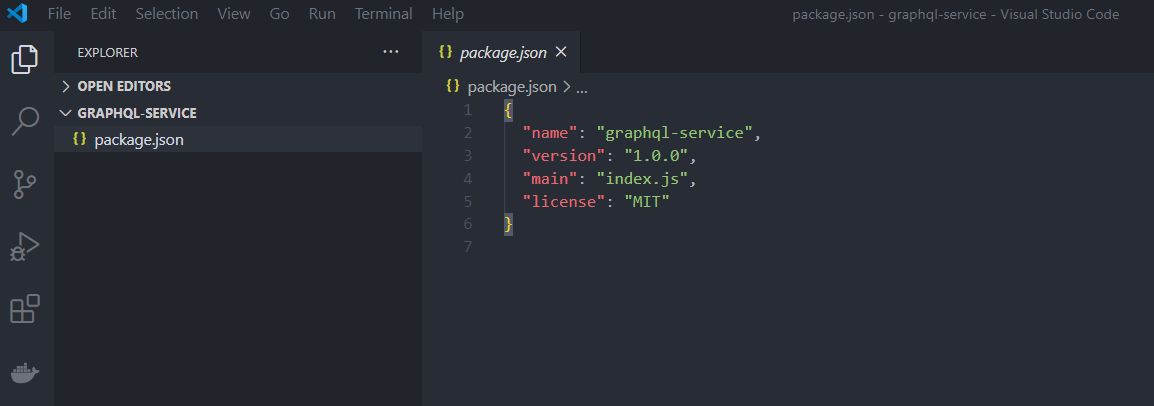
We now have our package file:
Now we need to install some dependencies and libraries that we'll use to develop our solution. We'll be using two types of dependencies; devDependencies and dependencies.
dependencies These are packages that are required to run your JavaScript. If you import lodash at runtime, then it should go in dependencies. When you publish your code on npm, and another user installs it, it will also install these dependencies. (These are known as transitive dependencies.)
devDependencies These packages are used to develop and test your code but are not required at runtime. Your test framework would be an example of a devDependency. Unlike dependencies, these are not installed transitively with your packages.
From https://www.oreilly.com/library/view/effective-typescript/9781492053736/ch06.html
When we set the -D flag, it means we're adding the dependency as a devDependency. We'll also be using Typescript, and we need to install the typescript dependency and some types' definitions from other libraries using the @types. Typescript doesn't recognize the types from independent packages, so we need to install these @types.
First, let's add Typescript and the type definitions for Node.js.
yarn add -D @types/node typescript
When we run our Typescript project using the tsc command, it will compile the .ts files to .js files to execute the javascript files, but sometimes we want to run our .ts scripts directly. We need to install the ts-node dependency.
To run the application, we'll be using nodemon. This will help develop our application by automatically restarting the node application when any file change is detected.
yarn add -D ts-node nodemon
To work on this Typescript project, we need a tsconfig.json file. This file will have the compile options required to compile our project. We can create this file from scratch, or we can execute the next command, which will make the file with some preset options to work with GraphQL that we can later modify depending on our needs.
npx tsconfig.json
And then select node when it asks you what framework you're using. The resulting file will be like this:
{
  "compilerOptions": {
    "target": "es6",
    "module": "commonjs",
    "lib": [
      "dom",
      "es6",
      "es2017",
      "esnext.asynciterable"
    ],
    "sourceMap": true,
    "outDir": "./dist",
    "moduleResolution": "node",
    "removeComments": true,
    "noImplicitAny": true,
    "strictNullChecks": true,
    "strictFunctionTypes": true,
    "noImplicitThis": true,
    "noUnusedLocals": true,
    "noUnusedParameters": true,
    "noImplicitReturns": true,
    "noFallthroughCasesInSwitch": true,
    "allowSyntheticDefaultImports": true,
    "esModuleInterop": true,
    "emitDecoratorMetadata": true,
    "experimentalDecorators": true,
    "resolveJsonModule": true,
    "baseUrl": "."
  },
  "exclude": [
    "node_modules"
  ],
  "include": [
    "./src/**/*.tsx",
    "./src/**/*.ts"
  ]
}
As we can see in the tsconfig.json file, one of the options is "outDir" set to "./dist". This is important since it means that our javascript transpile files will reside in that folder.
Now let's install GraphQL and a framework to work with GraphQL called TypeGraphQL, which will help with the schema definitions and resolvers creation using only classes and decorators. Also, the reflect-metadata is required to work with TypeGraphQL. We need to run the following command.
yarn add graphql type-graphql
yarn add reflect-metadata
Since we created a PostgreSQL database in AWS, we need to add a PostgreSQL client to our project. We will also be using an ORM called TypeORM, an excellent tool for all database-related coding we need to do. Let's run the following command.
yarn add pg typeorm
And finally, we are going to use a community-maintained open-source GraphQL server called Apollo Server. It's a great tool to build a production-ready, self-documenting GraphQL API. We also are going to use Express, which is a flexible Node.js web application framework that is going to be useful in our development process. And we are going to add the type definitions of Express.
yarn add express apollo-server-express
yarn add -D @types/express
When installing these dependencies, we will get a file in our project called yarn.lock, which will control all the dependencies' use and exact versions. This is to maintain consistent installs across machines.
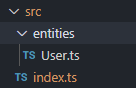
Let's create a folder called 'src' inside our project to store all of our code.
Our project structure should look like this:
Step 4: Scripts to run our project
Now that we have our project structure ready, let's add some useful script to our package.json. These scripts are going to help us run our code.
We need to add a "scripts" section to the package.json file with some scripts and let's explain what those are.
  "scripts": {
    "watch": "tsc -w",
    "dev": "nodemon dist/index.js",
    "devts": "nodemon --exec ts-node src/index.ts"
  },
The first script called "watch" will help us run the TypeScript compiler with the command "tsc." This command takes our Typescript files, compiles them into javascript files, and checks if there are any errors in the process. The flag -w will run the compiler in watch mode, which means that every time we make a change on our code, it will automatically trigger a recompilation.
To test the watch script, let's create an index.ts file inside our src folder with a single code line.
console.log("Coding the World");
Then let's go to the terminal in VS Code and run the script yarn watch. As we can see in the terminal, it executes the tsc -w command and starts the compilation. It will also tell us if it has any errors.
yarn run v1.22.10
$ tsc -w
Starting compilation in watch mode...

Found 0 errors. Watching for file changes.
Let's check our folder structure, and we can see it created a "dist" folder, and inside of it, we have an index.js file with the compiled code. In this case, the compiler didn't do much, so it's the same as in the index.ts file.
Now let's add a second line to the index.ts file console.log("Changing the code"); and save the file. As we can see, we did not need to rerun the watch command as it automatically compiled our code thanks to the -w flag.
Now let's run our code with the script yarn dev, which executes the nodemon command with the index.js file in the dist folder. We can add a second terminal in our VS Code by clicking the + button at the top to have both scripts running simultaneously.
PS D:\Projects\graphql-service> yarn dev
yarn run v1.22.10
$ nodemon dist/index.js
[nodemon] 2.0.6
[nodemon] to restart at any time, enter `rs`
[nodemon] watching path(s): *.*
[nodemon] watching extensions: js,mjs,json
[nodemon] starting `node dist/index.js`
Coding the World
Changing the code
[nodemon] clean exit - waiting for changes before restart
In the terminal, we can see the result of printing "Coding the World" and "Changing the code." And we can also see that nodemon is waiting for changes to rerun the code, so if we add a third line of code to the index.ts file and save it, it will automatically run again.
[nodemon] restarting due to changes...
[nodemon] starting `node dist/index.js`
Coding the World
Changing the code
Third one
[nodemon] clean exit - waiting for changes before restart
The "devts" script is in there in case we want to run the index.ts file instead.
PS D:\Projects\graphql-service> yarn devts
yarn run v1.22.10
$ nodemon --exec ts-node src/index.ts
[nodemon] 2.0.6
[nodemon] to restart at any time, enter `rs`
[nodemon] watching path(s): *.*
[nodemon] watching extensions: ts,json
[nodemon] starting `ts-node src/index.ts`
Coding the World
Changing the code
Third one
[nodemon] clean exit - waiting for changes before restart
Step 5: Let's add the User entity
The first thing we're going to do is create a main function that will be asynchronous. All the code is going to be inside this function. And then we're going to call the main function to execute our code.
const main = async () => {
  console.log("Coding the World");
};

main().catch((err) => {
    console.error(err);
});
As you can see, we added a catch to the main function to print in the console any errors we might have.
Now let's import Typeorm with the function createConnection to test our connection to the database. Inside our main function, let's call the createConnection and set the parameters to our AWS Postgres database.
import { createConnection } from "typeorm";

const main = async () => {
    const conn = await createConnection({
        type: "postgres",
        host: "db-graphql-turorial.???????.us-west-2.rds.amazonaws.com",
        database: "graphql_tutorial",
        username: "postgres",
        password: "postgres",
        logging: true,
        synchronize: true,
        entities: [],
      });
};

main().catch((err) => {
    console.error(err);
});
In the host parameter, we have to set the Endpoint to our AWS database that we got earlier and also setting the database name, username, password, and logging if we want to log any query and error to be enabled.
The synchronize option is useful during development as it will auto-create the database schema on every application launch, saving us time to manually creating the tables.
The entities option will be empty as we will put our tables' entities there later on. If we save and run our code, we should be connected to the AWS database.
[nodemon] restarting due to changes...
[nodemon] starting `node dist/index.js`
query: START TRANSACTION
query: SELECT * FROM "information_schema"."tables" WHERE "table_schema" = current_schema() AND "table_name" = 'typeorm_metadata'
query: COMMIT
[nodemon] clean exit - waiting for changes before restart
Now let's create our user entity. First, we need to create an entities folder inside src and an User.ts file inside entities.
Then we're going to add a user class that extends from Typeorm's BaseEntity, so we need to add an Entity decorator before the class declaration to mark it as a database entity. So we need to import BaseEntity and Entity from Typeorm.
We will add the columns, id, createdAt, updatedAt, username, email, and password with their respective types. We use the ! sign in id, username, and email to indicate that these properties can't be null or undefined.
import { BaseEntity, Entity } from "typeorm";

@Entity()
export class User extends BaseEntity {
  id!: number;
  createdAt = Date();
  updatedAt = Date();
  username!: string;
  email!: string;
  password: string;
}
We are also going to use some property decorators from Typeorm and add them to our columns.
- For the id, we will add the PrimaryGeneratedColumn to indicate a primary column automatically generated with an auto-increment value.
- For the createdAt, we will add the CreateDateColumn to indicate that we will store the user's creation date.
- For the updatedAt, we will add the UpdateDateColumn to indicate that we will store the date every time we modify the user.
- For the username, email and password, we will add the Column to indicate that these are table columns. For the username and email, we're going to use the unique property.
We need to import PrimaryGeneratedColumn, CreateDateColumn, UpdateDateColumn and Column from typeorm.
import {
  BaseEntity,
  Column,
  CreateDateColumn,
  Entity,
  PrimaryGeneratedColumn,
  UpdateDateColumn,
} from "typeorm";

@Entity()
export class User extends BaseEntity {
  @PrimaryGeneratedColumn()
  id!: number;

  @CreateDateColumn()
  createdAt = Date();

  @UpdateDateColumn()
  updatedAt = Date();

  @Column({ unique: true })
  username!: string;

  @Column({ unique: true })
  email!: string;

  @Column()
  password: string;
}
We will then use TypeGraphQL and add some decorators to indicate that we need to use it as a type in GraphQL. So before our entity decorator, we add the ObjectType decorator.
And for each class property, we add the Field decorator to indicate that they should be mapped to the GraphQL fields.
And we should import ObjectType and Field from type-graphql.
Our resulting entity class is this:
import { ObjectType, Field } from "type-graphql";
import {
  BaseEntity,
  Column,
  CreateDateColumn,
  Entity,
  PrimaryGeneratedColumn,
  UpdateDateColumn,
} from "typeorm";

@ObjectType()
@Entity()
export class User extends BaseEntity {
  @Field()
  @PrimaryGeneratedColumn()
  id!: number;

  @Field(() => String)
  @CreateDateColumn()
  createdAt = Date();

  @Field(() => String)
  @UpdateDateColumn()
  updatedAt = Date();

  @Field()
  @Column({ unique: true })
  username!: string;

  @Field()
  @Column({ unique: true })
  email!: string;

  @Field()
  @Column()
  password: string;
}
Now we can go to our index.ts and add the user in the entities field and import it from the user class.
import { createConnection } from "typeorm";
import { User } from "./entities/User";

const main = async () => {
  const conn = await createConnection({
    type: "postgres",
    host: "db-graphql-turorial.???????.us-west-2.rds.amazonaws.com",
    database: "graphql_tutorial",
    username: "postgres",
    password: "postgres",
    logging: true,
    synchronize: true,
    entities: [User],
  });

};

main().catch((err) => {
  console.error(err);
});
When we run our code, TypeOrm will detect the User entity and check the database to see if that table exists. In this case, the table doesn't exist, and since we set the synchronize to true, the user table will be automatically created, which is great to speed the development of the API.
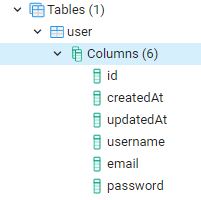
We can check the database to see the newly created user table.
Step 6: Let's add our Resolver
A resolver is a function that helps us to populate the data for our schema. First, let's add some basic resolver with the necessary functionality to query the users' table.
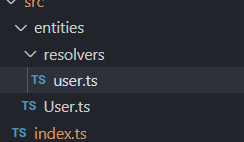
Let's create a folder called 'resolvers' and inside a user.ts file.
Let's add a UserResolver class and add the Resolver decorator from our TypeGraphQL library.
import { Resolver } from "type-graphql";

@Resolver()
export class UserResolver {

}
Inside this class, we are going to add some functions. These functions can either be queries or mutations. Let's first add some queries.
First, a query to get all the users, and we need to import the Query decorator from TypeGrapQL and the User entity we created before.
@Query(() => [User])
  async users(): Promise<User[]> {
    return await User.find();
  }
We created a 'users' function in the decorator where we need to indicate what the query will return, in this case, an instance of the user entity. Inside our function, we call the find method from the User entity that comes from TypeOrm, and it will basically get all the users in our user table.
Now let's add our second query to get a single user. The function will be called user.
@Query(() => User, { nullable: true })
  async user(@Arg("id") id: number): Promise<User | undefined> {
    return await User.findOne(id);
  }
In this case, we indicate in the decorator that we will get a User, but in this case, we add the property nullable since we might not get any user. Our function will receive a parameter called 'id', so we need to use the Arg parameter decorator and import it from TypeGrapQL. We will use the findOne function from TypeORM that receives the id parameter and get that specific user.
We will also add a simple test query so that we can test our GraphQL API.
import { Arg, Query, Resolver } from "type-graphql";
import { User } from "../entities/User";

@Resolver()
export class UserResolver {
  @Query(() => [User])
  async users(): Promise<User[]> {
    return await User.find();
  }

  @Query(() => User, { nullable: true })
  async user(@Arg("id") id: number): Promise<User | undefined> {
    return await User.findOne(id);
  }

  @Query(() => String)
  test() {
    return "This is a TEST";
  }
}
That's our user resolver so far.
Step 7: Let's add our Server
First, we're going to add the express function from the Express library in the index.ts file import express from "express";. Then inside our main function, we're going to create an app from express const app = express();.
And now we're going to tell our Server to start listening on port 4000 with the listen function.
const app = express();

 app.listen(4000, () => {
    console.log("Server started on localhost:4000");
  });
Now we're going to add our GraphQL Endpoint using Apollo. Let's add the ApolloServer from the apollo-server-express library. import { ApolloServer } from "apollo-server-express";
And before the app.listen line, we will create the AppolloServer const apolloServer = new ApolloServer, and inside, let's add the schema parameter and call the function buildSchema. To use buildSchema, we need to add this import import { buildSchema } from "type-graphql";.
  const apolloServer = new ApolloServer({
    schema: await buildSchema({
      resolvers: [UserResolver],
      validate: false,
    }),
  });

  apolloServer.applyMiddleware({ app });
As you can see, we are calling the buildSchema function, and we are setting the parameter resolvers with the UserResolver we created before. To do this, we also need to add this import { UserResolver } from "./entities/resolvers/user";.
And we also need to add, after the ApolloServer creation, a call to the applyMiddleware method with our app variable, the Express application. And what all of this is going to do, is create a GraphQL endpoint for us.
import { createConnection } from "typeorm";
import { User } from "./entities/User";
import express from "express";
import { ApolloServer } from "apollo-server-express";
import { buildSchema } from "type-graphql";
import { UserResolver } from "./resolvers/user";

const main = async () => {
  const conn = await createConnection({
    type: "postgres",
    host: "db-graphql-turorial.????????.us-west-2.rds.amazonaws.com",
    database: "graphql_tutorial",
    username: "postgres",
    password: "postgres",
    logging: true,
    synchronize: true,
    entities: [User],
  });

  const app = express();

  const apolloServer = new ApolloServer({
    schema: await buildSchema({
      resolvers: [UserResolver],
      validate: false,
    }),
  });

  apolloServer.applyMiddleware({ app });

  app.listen(4000, () => {
    console.log("Server started on localhost:4000");
  });
};

main().catch((err) => {
  console.error(err);
});
That's our index.ts file so far.
So if we run our project with yarn dev, we can test the GraphQL API in the browser. Remember that we also need to be running the yarn watch script if we have made any changes in the code.
Let's go to http://localhost:4000/graphql in our browser, and we should get this:

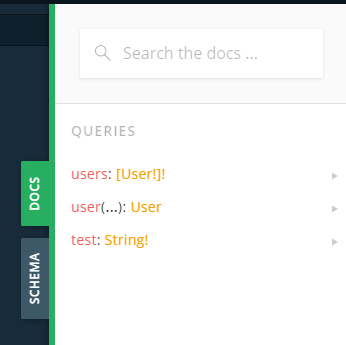
That's the GraphQL playground tool where we can test out our queries. If we click on the Docs button, we can see our defined queries. And on the schema button, we can see our Schema structure.
Let's try running our test query. All we need to do is add these next lines and press play.
{
  test
}

We can see the result is the message that we put on our user resolver, which means our GraphlQL API works well. We will not test the users and user query yet because we don't have anything on our users' table.
Step 8: Let's add a Register Mutation to our Resolver
Let's go to our UserResolver.ts file to create a mutation. Inside the UserResolver class, let's create a register function with this structure:
@Mutation(() => UserResponse)
  async register(
    @Arg("username") username: string,
    @Arg("email") email: string,
    @Arg("password") password: string
  ): Promise<UserResponse> {

  }
As you can see, we are using the Mutation decorator provided by TypeGraphql, so our API knows this is a Mutation function. In this decorator, we are setting a class called UserResponse, which we'll define later. We had set a promise with the same UserResponse class to indicate what we will get when the asynchronous operation completes.
We have included 3 arguments that we need to register our user: the username, email, and password.
We will use the argon library to hash the password before inserting it in the database, so we need to add this dependency yarn add argon2.
To create the user, let's first create a variable to store the user and add a try-catch to execute the register code. Inside the try, let's add a const hashedPassword and call the hash method from argon2.
Let's use the createQueryBuilder function from TypeORM and call insert indicating the User entity and setting the username, email, and password in the values. Then we are going to store the results in the userResponse variable.
We will set and return an object from User Response with the error received in the catch. And finally, we are returning the user we have just created.
The code is the following:
 let userResponse;
    try {
      const hashedPassword = await argon2.hash(password);
      const result = await getConnection()
        .createQueryBuilder()
        .insert()
        .into(User)
        .values({
          username: username,
          email: email,
          password: hashedPassword,
        })
        .returning("*")
        .execute();
      userResponse = result.raw[0];
    } catch (err) {
      userResponse = {
        errors: err.detail,
      };

      return userResponse;
    }

    return {
      user: userResponse,
    };
Let's define the UserResponse we mention earlier. This is a class that will help return either the user-created or the error received. In this class, we defined two properties; a string error and a user of type User. And we use the decorators ObjectType and Field from TypeGraphQL.
@ObjectType()
class UserResponse {
  @Field(() => String, { nullable: true })
  errors?: string;

  @Field(() => User, { nullable: true })
  user?: User;
}
We also need to add these imports:
import {
  Arg,
  Field,
  Mutation,
  ObjectType,
  Query,
  Resolver,
} from "type-graphql";
import { User } from "../entities/User";
import { getConnection } from "typeorm";
import argon2 from "argon2";
So our User Resolver so far is this:
import {
  Arg,
  Field,
  Mutation,
  ObjectType,
  Query,
  Resolver,
} from "type-graphql";
import { User } from "../entities/User";
import { getConnection } from "typeorm";
import argon2 from "argon2";

@ObjectType()
class UserResponse {
  @Field(() => String, { nullable: true })
  errors?: string;

  @Field(() => User, { nullable: true })
  user?: User;
}

@Resolver()
export class UserResolver {
  @Query(() => [User])
  async users(): Promise<User[]> {
    return await User.find();
  }

  @Query(() => User, { nullable: true })
  async user(@Arg("id") id: number): Promise<User | undefined> {
    return await User.findOne(id);
  }

  @Query(() => String)
  test() {
    return "This is a TEST";
  }

  @Mutation(() => UserResponse)
  async register(
    @Arg("username") username: string,
    @Arg("email") email: string,
    @Arg("password") password: string
  ): Promise<UserResponse> {
    let userResponse;
    try {
      const hashedPassword = await argon2.hash(password);
      const result = await getConnection()
        .createQueryBuilder()
        .insert()
        .into(User)
        .values({
          username: username,
          email: email,
          password: hashedPassword,
        })
        .returning("*")
        .execute();
      userResponse = result.raw[0];
    } catch (err) {
      userResponse = {
        errors: err.detail,
      };

      return userResponse;
    }

    return {
      user: userResponse,
    };
  }
}
Step 9: Let's add a Login Mutation to our Resolver
Now that we defined the register mutation let's go and create another mutation that we can use to log in the user to the app. We are going to validate that the user exists and the password input is correct.
We're using the same UserResponse from the register resolver, and this time, we have two arguments, the username and password.
  @Mutation(() => UserResponse)
  async login(
    @Arg("username") username: string,
    @Arg("password") password: string
  ): Promise<UserResponse> {

  }
We will use the findOne method from TypeORM, sending the username. This will make a query to the user table in the database and search for the given user. The results will be saved in a user constant.
Then we need to check the result of the findOne method with an if clause, and if we didn't get anything, let's set an error message indicating that the user name doesn't exist.
Then let's check if that password is correct. First, we need to use the verify method from argon comparing the password on the database and the input password. If the password is not valid, we set an error message indicating that.
And lastly, we return the user. We get our mutation resolver.
@Mutation(() => UserResponse)
  async login(
    @Arg("username") username: string,
    @Arg("password") password: string
  ): Promise<UserResponse> {
    const user = await User.findOne({
      username: username.toLowerCase(),
    });

    let userResponse;
    if (!user) {
      userResponse = {
        errors: "That Username doesn't exist",
      };

      return userResponse;
    }

    const valid = await argon2.verify(user.password, password);
    if (!valid) {
      userResponse = {
        errors: "That Password is not valid",
      };

      return userResponse;
    }

    return {
      user: userResponse,
    };
And now our resolver is complete:
import {
  Arg,
  Field,
  Mutation,
  ObjectType,
  Query,
  Resolver,
} from "type-graphql";
import { User } from "../entities/User";
import { getConnection } from "typeorm";
import argon2 from "argon2";

@ObjectType()
class UserResponse {
  @Field(() => String, { nullable: true })
  errors?: string;

  @Field(() => User, { nullable: true })
  user?: User;
}

@Resolver()
export class UserResolver {

  //Query Users
  @Query(() => [User])
  async users(): Promise<User[]> {
    return await User.find();
  }

  //Query Single User
  @Query(() => User, { nullable: true })
  async user(@Arg("id") id: number): Promise<User | undefined> {
    return await User.findOne(id);
  }

  //Mutation Register Resolver
  @Mutation(() => UserResponse)
  async register(
    @Arg("username") username: string,
    @Arg("email") email: string,
    @Arg("password") password: string
  ): Promise<UserResponse> {
    let userResponse;
    try {
      const hashedPassword = await argon2.hash(password);
      const result = await getConnection()
        .createQueryBuilder()
        .insert()
        .into(User)
        .values({
          username: username,
          email: email,
          password: hashedPassword,
        })
        .returning("*")
        .execute();
      userResponse = result.raw[0];
    } catch (err) {
      userResponse = {
        errors: err.detail,
      };

      return userResponse;
    }

    return {
      user: userResponse,
    };
  }

  //Mutation Login Resolver
  @Mutation(() => UserResponse)
  async login(
    @Arg("username") username: string,
    @Arg("password") password: string
  ): Promise<UserResponse> {
    const user = await User.findOne({
      username: username.toLowerCase(),
    });

    let userResponse;
    if (!user) {
      userResponse = {
        errors: "That Username doesn't exist",
      };

      return userResponse;
    }

    const valid = await argon2.verify(user.password, password);
    if (!valid) {
      userResponse = {
        errors: "That Password is not valid",
      };

      return userResponse;
    }

    return {
      user: user,
    };
  }
}
Step 10: Let's Test Our GraphQL API
Now that we have our code ready, let's test it to see if it's working correctly. Let's go to http://localhost:4000/graphql in our browser and work in the GraphQL Playground.
First, let's try the Register mutation and create some users.
mutation {
  register(username: "coder", password: "coder", email: "coder@coder.com") {
    user {
      id
      createdAt
      username
      email
      password
    }
    errors
  }
}
In the syntax of the mutation, we need to use the word mutation, and inside we will call the register mutation sending the three arguments it needs. In the results, we have set the user and errors to be returned, and inside the user, we specified what fields of the created user we want the service to return.
If we execute the mutation by clicking the Play button, we should get the results on the right side:
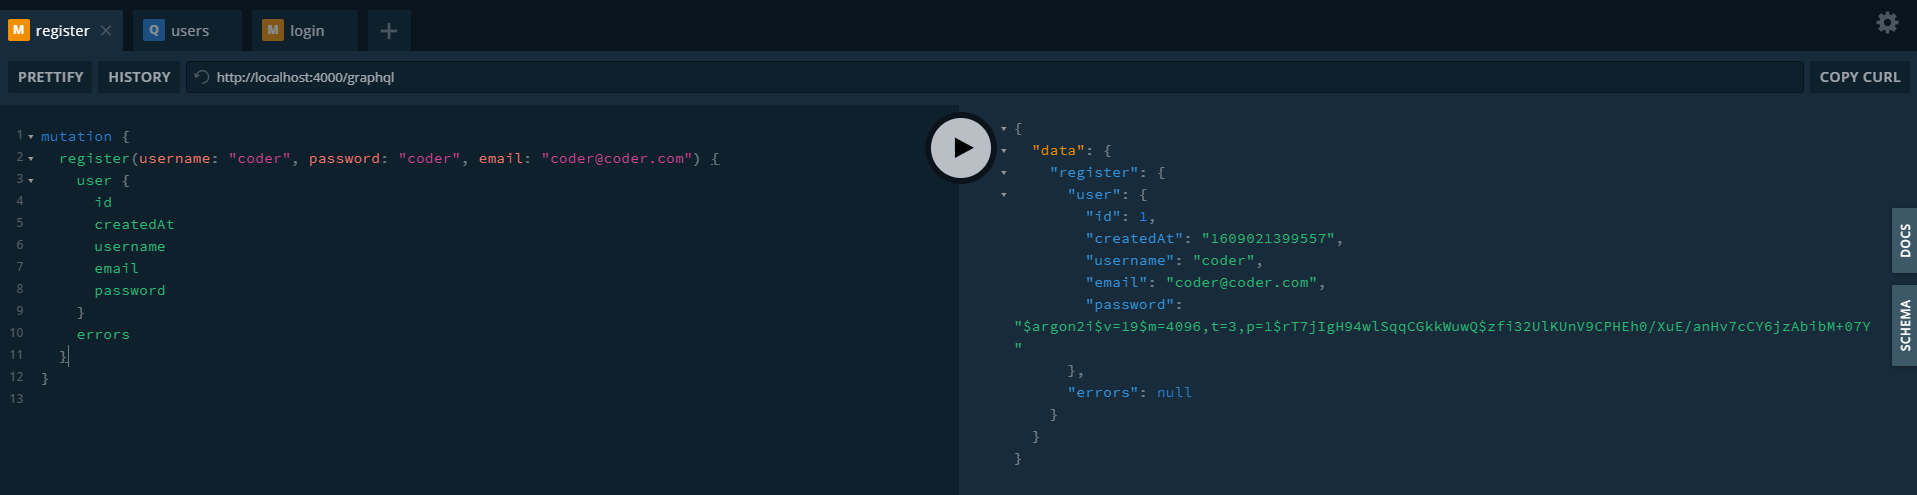
As you can see, the service returned the user-created data and no errors, which means it worked. We can see the assigned id and the hashed password.
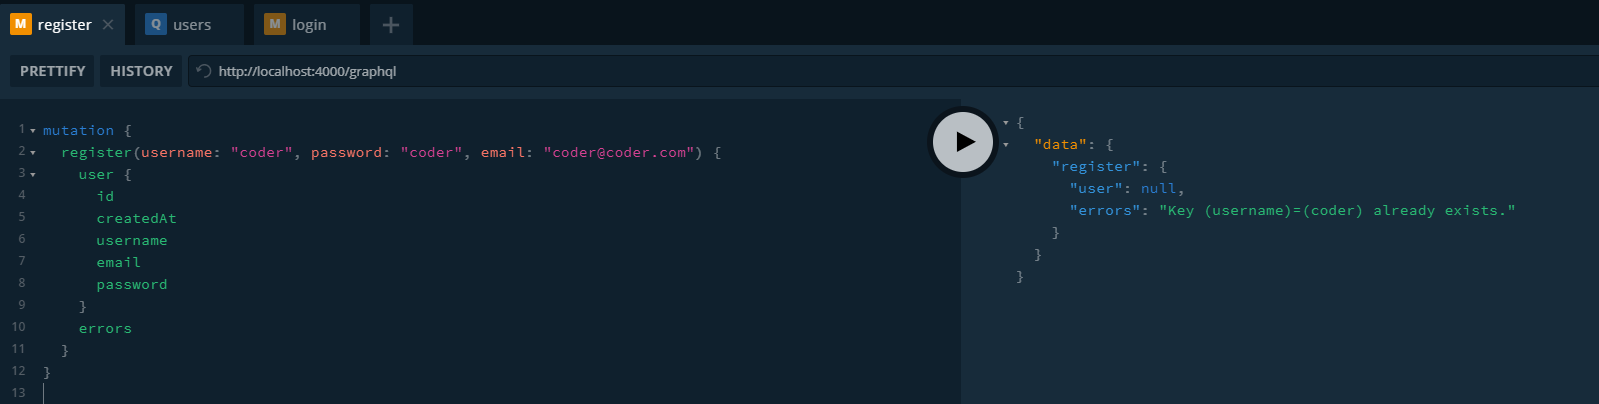
If we try to rerun the same mutation, we get an error message from the database Key (username)=(coder) already exists. because the username must be unique.
Try with a different username to create another user.
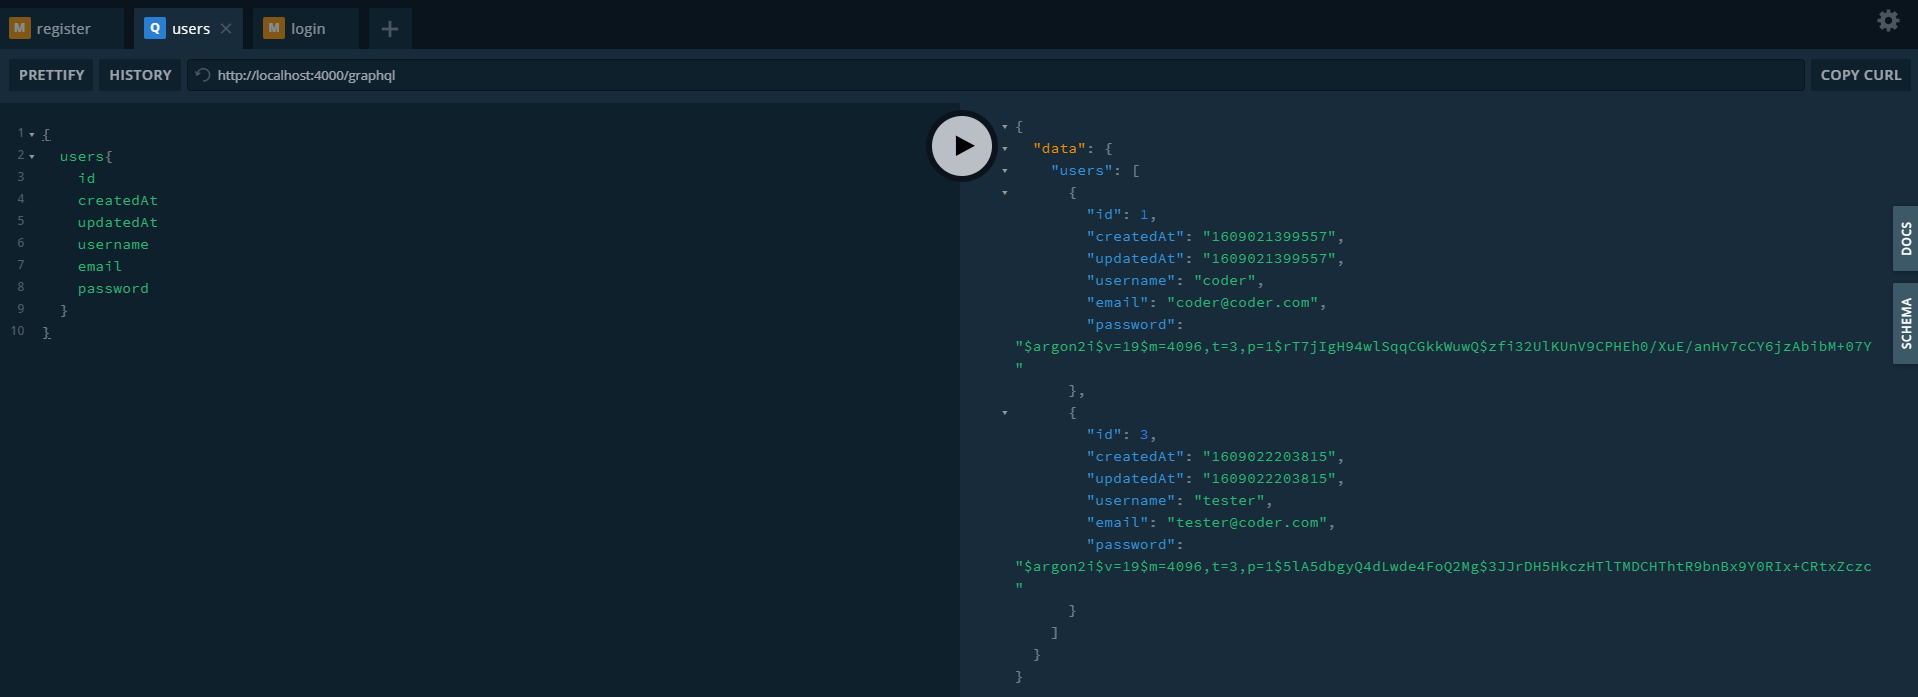
Now that we have some users created, let's test the users' query:
{
  users{
    id
    createdAt
    updatedAt
    username
    email
    password
  }
}
We need to specify the query to use, and inside, the fields we want the service to return. When we press play, we get all the users on the database:
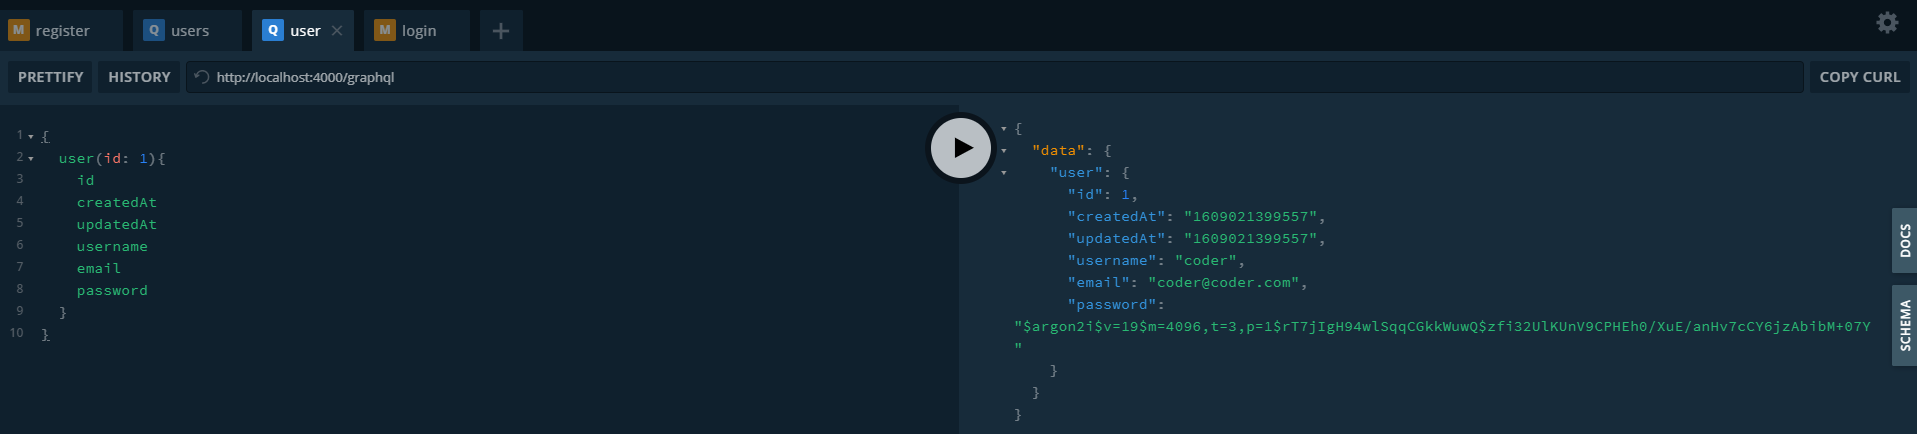
Now let's try querying a single user:
{
  user(id: 1){
    id
    createdAt
    updatedAt
    username
    email
    password
  }
}
This time we use the user query, and we send the id of the user as an argument. We should get the information just for that user.
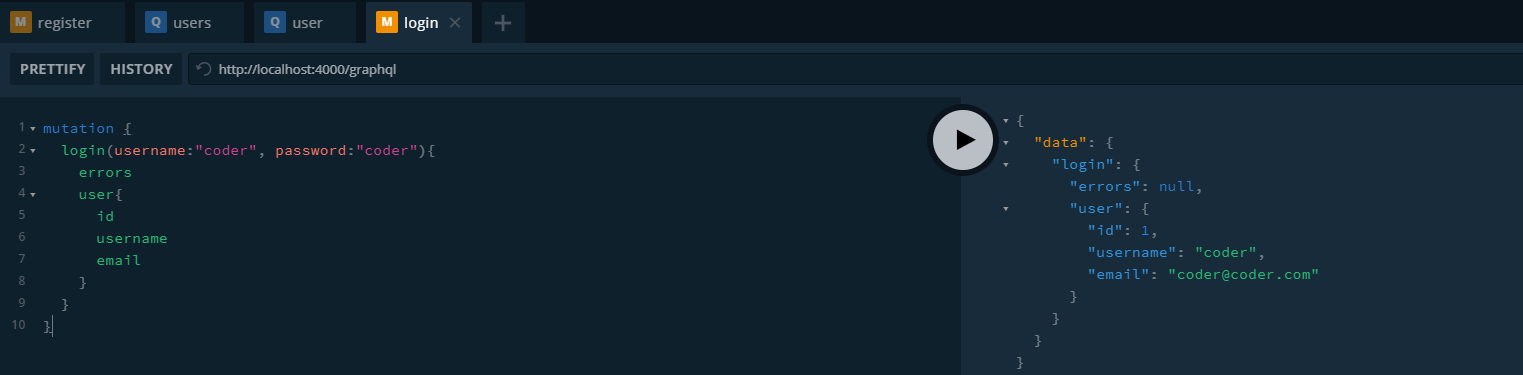
And finally, let's test the login mutation:
mutation {
  login(username:"coder", password:"coder"){
    errors
    user{
      id
      username
      email
    }
  }
}
We use the login mutation setting two arguments, the username and the password. And we indicate that we need the errors and user in return. We should get a successful user returned when we execute this for the username coder and password coder.
Let's try changing the password to see if it is validating correctly. We should get the message "That Password is not valid".

Conclusion
There you go, we have just created a simple GrapQL API Service connected to a PostgreSQL database in AWS. And now, we can start building more complex and robust services for our applications.
You can download the source code from Github.
If you want to learn about cloud and development technologies, I recommend Cloud Academy, which has several courses about AWS, Azure, GCP, ReactJS, and many more.


